
Hello, everyone! If you’ve ever wondered “How exactly does this guy notice all those tiny differences?”, “How much time goes into every comparison?” or even “How can I do the same thing, but with another show?”, then you’re in luck!
Welcome to today’s rather special post, aptly titled “How is a comparison born?”!
As a disclaimer, the process I’m about to describe is one I discovered through trial and error; it is by no means the only way, or even the best one! If you’ve got some ideas on how to improve it, then I encourage you to weigh in, and leave your comment below.
Without further ado, then, let’s get right to it!
Requirements
For this tutorial you’ll need:
- Rips for the two versions of the episode you want to compare;
- ffmpeg;
- Bulk Rename Utility, or another batch-rename utility;
- GIMP, or another image manipulation software (optional, see step 3b);
- ImageMagick;
- FastStone, or another image viewing program;
- A terminal/shell/command prompt;
- At the very least 8-9gb of free hard-disk space (double that if you have to do step 3b);
- A couple of days of free time.
Once you make sure everything is in order, let’s dive into the first step!
1) Acquire the two versions of the episode you wish to compare
The first (and probably the only) step on which every possible tutorial on this matter will have to agree.
There are plenty of ways to do this, of course. You can book a ticket to Japan (be sure to select a date which is at least a month away, so you have plenty of time to get excited and plan your trip accordingly. Go visit Kyoto and Nara! They’re absolutely incredible!), and when you’re there you can track down the nearest anime-related shop (even a well-stocked bookshop will do) and buy the Blu-ray you want! You can also head to a nearby Book-off (there are a myriad of those over there) and you’ll get lower prices.
…Or you can order them on Amazon. Your choice.
2) Extract every frame from each rip
Once you have both a TV and BD version of the episode you wish to compare, the next step in my workflow is to extract every frame in each one.
To do so, I use ffmpeg, a free, open-source multimedia framework with a handy command-line utility.
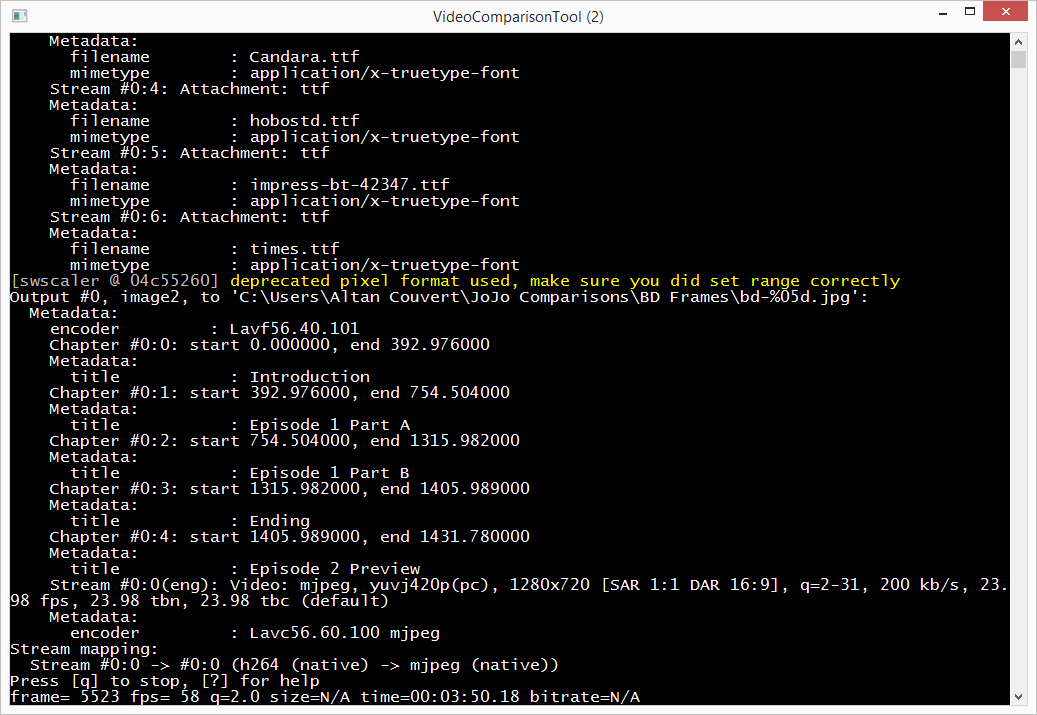
Once ffmpeg is installed on your PC/Mac/Linux machine, open up the command prompt/shell/terminal software of choice and (if ffmpeg has been installed properly), you should be able to run the following commands (substitute the values in the square brackets with the relative paths):
ffmpeg -i [BD rip path] -q:v 2 -vf fps=23.976215 -vf scale=1280:-1 "[BD folder]\bd-%%05d.jpg"
and
ffmpeg -i [TV rip path] -q:v 2 -vf fps=23.976215 -vf scale=1280:-1 "[TV folder]\tv-%%05d.jpg"
Alright, let’s break this down.
ffmpegis used to call the program itself;-i [XX rip path]indicates to ffmpeg where the input (-i) file is located;-q:v 2is an option used to tell ffmpeg the video quality (-q:v) level we want. The number that follows-q:vcan range from 1 to 31, with 1 being highest quality (least compression) and 31 being worst quality (most compression). You can change this up if you prefer;-vf fps=23.976215tells ffmpeg which framerate the input video runs in. I think this value automatically gets rounded to 24, but it never hurts to try, I guess;-vf scale=1280:-1tells ffmpeg which size we want our output frames to be in. The-1means “adapt this value automatically so as to maintain the original width:height ratio”. You can change the1280value to be basically anything you like, but be sure to change the same value in the TV extraction command as well, because we’ll need two images that have the same size for a correct comparison;"[BD folder]\xx-%%05d.jpg"this last argument tells ffmpeg where to save the output frames. You can change the first letters of thexx-%%05d.jpgpart around if you want; I personally like my frames to follow thexx-00001.jpgformat. Just be sure to keep the%%05d.jpgpart somewhere in your name, because%%05dtells ffmpeg that you want the frames to be named progressively with five digits, and we want the .jpg format to keep our blog post size at a minimum.
I suggest you to keep the TV and BD frames in two separate folders!
Once both versions of the episode have been extracted to two separate folders (for the purpose of this tutorial we’re using Episode #01 of Phantom Blood), you should end up with something that looks like this:
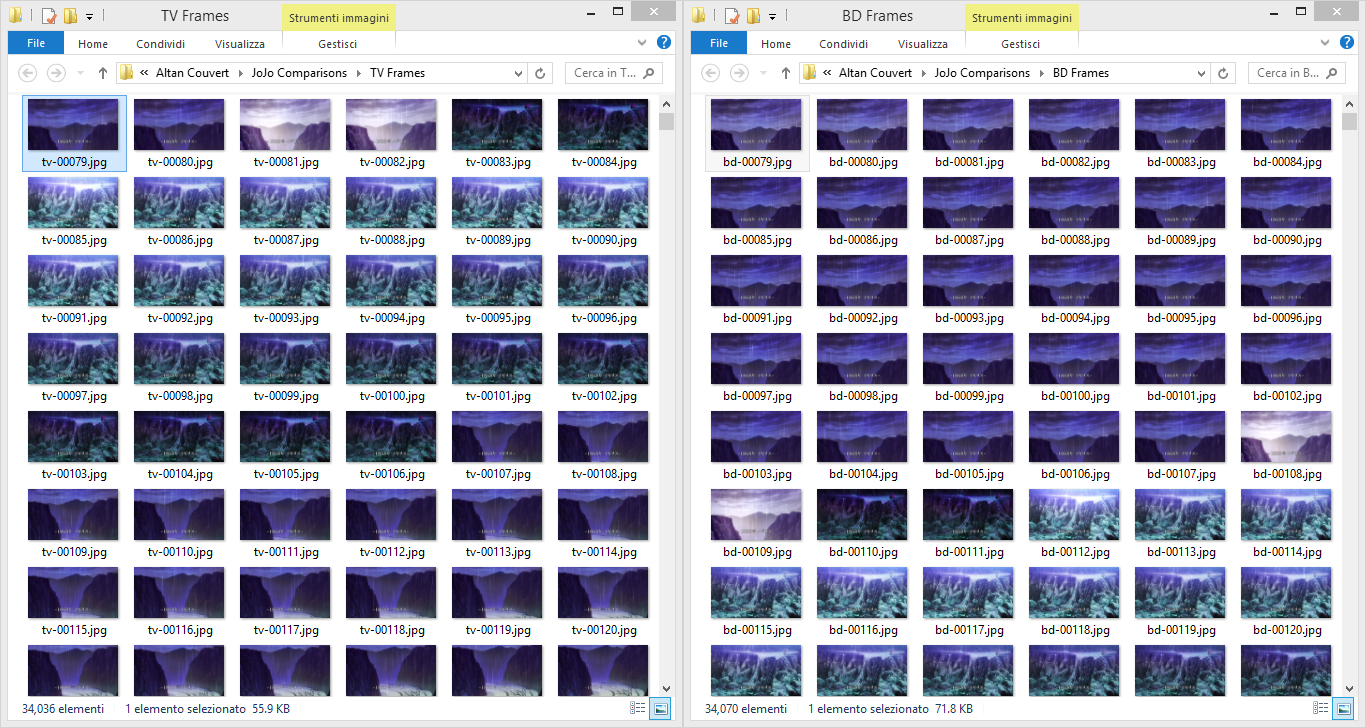
As you can notice from either scrolling a bit through your two folders or from looking at the above screenshot, the frames in the TV and BD versions don’t match! For example, the file called tv-00083.jpg is the first one from a new scene, but said scene doesn’t start until frame 00110 in the BD version.
For the comparison process to go successfully, we need each pair of files with the same number to be the same frame. To achieve that, we need to…
3) Remove the extra frames and batch-rename the remaining ones
For this step, we need a software that can batch-rename files (or you can code your own! It’s not that difficult). I’m partial to Bulk Rename Utility, but any program that can rename a whole bunch of files will do.
Let’s go a few lines back: as you can see, tv-00083.jpg is the same frame as bd-00110.jpg, which means that the BD version has 27 extra black frames at the beginning. You can probably guess what this means! Let’s remove the first 27 extra black frames from the BD version, and then we’ll have to batch-rename the remaining 34k files so that the numbering is uninterrupted (bd-00028.jpg becomes bd-00001.jpg, bd-00029.jpg becomes bd-00002.jpg, and so on).
This is how you achieve that with Bulk Rename Utility:
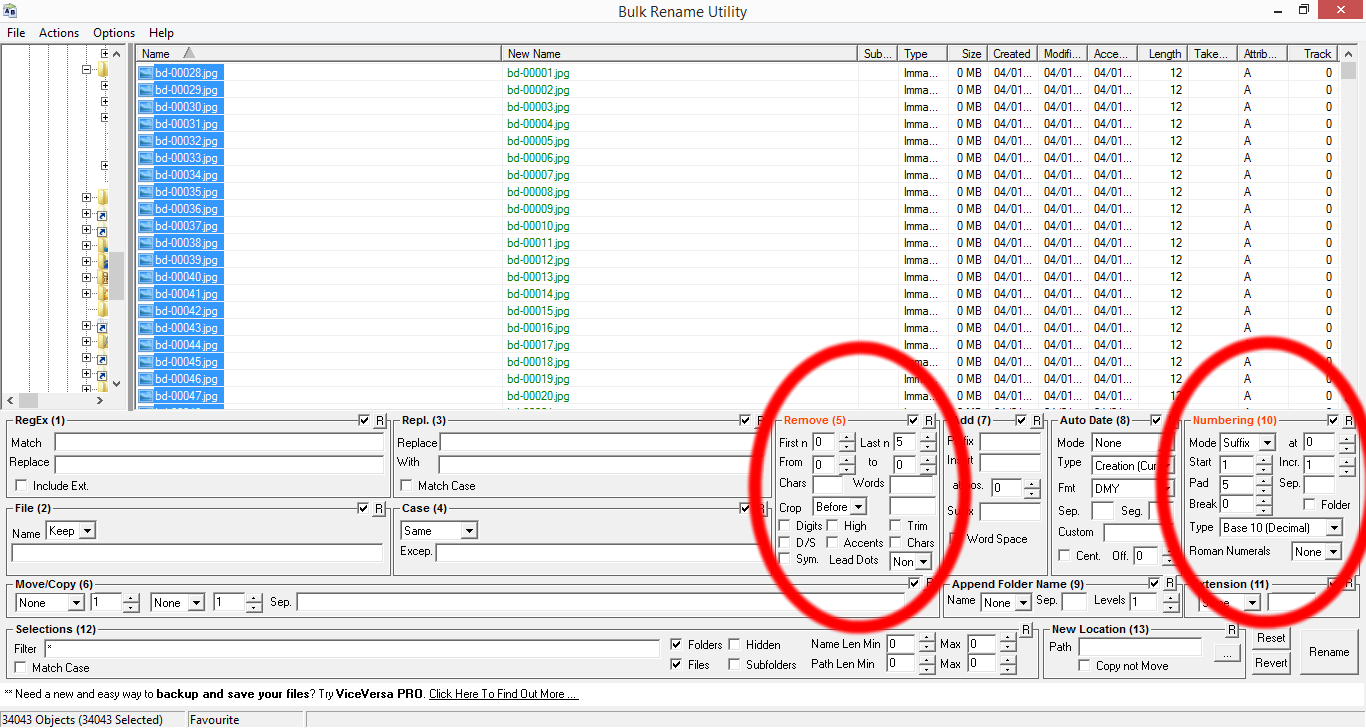
That takes care of the extra padding frames at the beginning. Unfortunately you’ll have to do that for every bit in which the frames don’t sync up; this will take some time, but in the end you should get the same number of frames in both folders. If you need a hint on where the TV and BD versions usually diverge, I can tell you that, generally speaking, the BD has some extra frames at the beginning, end and around the mid-episode eyecatch.
Once this (long and boring) step is done with, we can proceed and…
3b) Wait, stop! First, check how the two versions look when compared
Alright, this is an extra step I had to integrate into my existing workflow when I started doing Phantom Blood episodes. Take a look at this comparison:


Do you see how the TV version is very slightly more zoomed in? This could be caused by the way the episodes were ripped, or by the TV and BD versions being different broadcasts in the first place.
This is a very minor problem, and as such you might choose to ignore it entirely; but if you’re getting this kind of discrepancy between versions, the frame comparison step could prove to be not as easy!
Fiddling around with GIMP, I found out that the difference between the two frames could be rendered almost unnoticeable by:
- Stretching the BD frame by 4x2 and then cropping a 1280x720 rectangle in the middle, effectively losing a border of a couple of pixels;
- Cropping out the topmost row of pixels in the TV frame and then stretching the whole thing a pixel upwards.
(This may vary if you’re working on another series entirely, you just have to find the right numbers that do the trick for you and then act accordingly.)
To have this kind of change take effect on a whole whopping 34k files, we need another command-line utility: ImageMagick.
Once that’s properly installed, give the following commands a go:
cd [BD folder] && magick mogrify -path [temp folder] -resize 1284x722! -crop 1280x720+2+2 "*.jpg"
and
cd [TV folder] && magick mogrify -path [temp folder] -crop 1280x719+0+1 -resize 1280x720! "*.jpg"
I will not break these down, since they basically do as stated previously; anyway, when these two commands are done (and they’ll probably take a long time! On my dinky PC each one takes approximately 1h30~2h to complete), you’ll have 34k (x2) new frames in your temporary folders of choice.
The reason why I had you choose a new folder instead of just telling ImageMagick to overwrite your pre-existing .jpgs is twofold: firstly, in case anything goes wrong you won’t lose your original frames, and secondly, ImageMagick is not a very verbose program! It won’t tell you anything until it’s done, but we can circumvent that using an empty folder and keeping track of how many frames it’s done.
For comparison, here’s how the same frames look after ImageMagick has done its work:


After ImageMagick is done and you feel your frames look acceptable, you can remove the original frames and we can continue our work with the ones we just created.
4) Compare every pair of frames
Alright! Now this is what I’m talking about. What does “compare” mean?
In this case, we want a composite version of each pair of frames, to hide the parts that look the same and highlight the differences. ImageMagick comes, once again, to our rescue!
Thanks to a very useful function of the ImageMagick libraries, we can do precisely that; the only problem is that it only does so with a single pair of images, while we need it to do that for a whole folder of 34k files.
This can be quickly solved with a for or a foreach loop; if you need a hand with this you can use the following script. Just copy that in a text file, save it as a .bat file, run it and follow the instructions!
@echo off
setlocal enabledelayedexpansion
cls
echo.
set /p blusrc=Drag the BD folder here and press Enter:
set _blusrc=%blusrc:"=%
set /p tvsrc=Drag the TV folder here and press Enter:
set _tvsrc=%tvsrc:"=%
set /p compsrc=Drag the comparison output folder here and press Enter:
set _compsrc=%compsrc:"=%
echo.
for %%g in (%blusrc%\*.jpg) do (
  set numonly=%%~nxg
  set imgnum=!numonly:~3,11!
  magick composite "%%g" "%_tvsrc%\tv-!imgnum!" -compose difference "%_compsrc%\compare-!imgnum!"
  printf '\rFrame !imgnum! compared.'
)
echo.
echo Frame comparison done.
pause
This basically asks you to choose the source BD and TV folders, an output folder and then loops through each file therein, comparing them and producing a composite image. Since this is a rather rough script, it will probably spit some errors if one of the folders contain more files than the other; if that happens, go back and check if something went wrong in the previous steps.
When that’s over (it usually takes 2h~2h30 for me), you’ll finally have the compared frames, neatly arranged in a folder of your choice!
They’ll probably look mostly black, with some specks of white (generated by the difference in compression algorithms used for the TV and BD rips, or even by the different resolution of the source videos); a compared image with no differences will appear like this:
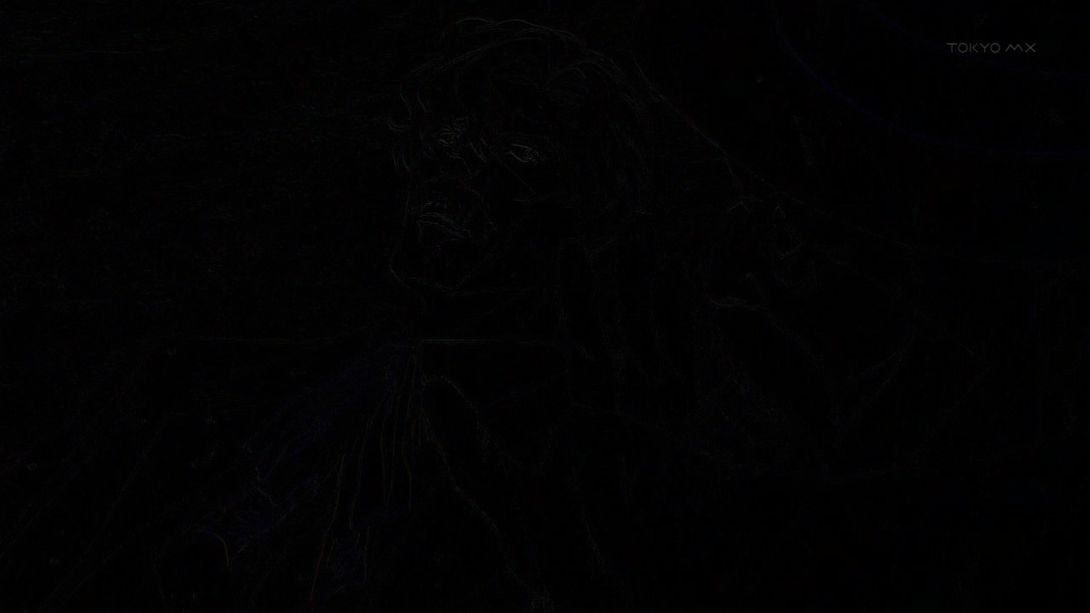
…while an image with some differences will look like this:

If you remember, earlier I advised you to not skip step 3b, even if you felt that the difference was very minor; this part here is precisely why: the less different the unchanged frames are, and the more the frames which have been retouched by David Production will stand out!
Now that you know what you’re looking for, all you have to do is go through them one by one! I know this sounds long and boring, but it’s actually the most enjoyable part for me (but that might just be because I enjoy repetitive tasks).
I prefer to avoid using the default image viewer program that comes pre-packaged with Windows, as it loads quite slowly and when you go through images quickly it usually defaults to a white background; as you can probably guess, looking for hours at a flashing white/black screen is not exactly my idea of fun.
I recommend using FastStone, which I find makes for a much more pleasant experience. Boot that up (or whichever other software you prefer), open a blank Notepad file, maybe put some nice music on and get to it. Be sure to note on said Notepad file whenever you find some differences, of course!
Here’s (part of) the .txt file I ended up with when I was done looking through the compared images for Phantom Blood #01, just for reference:
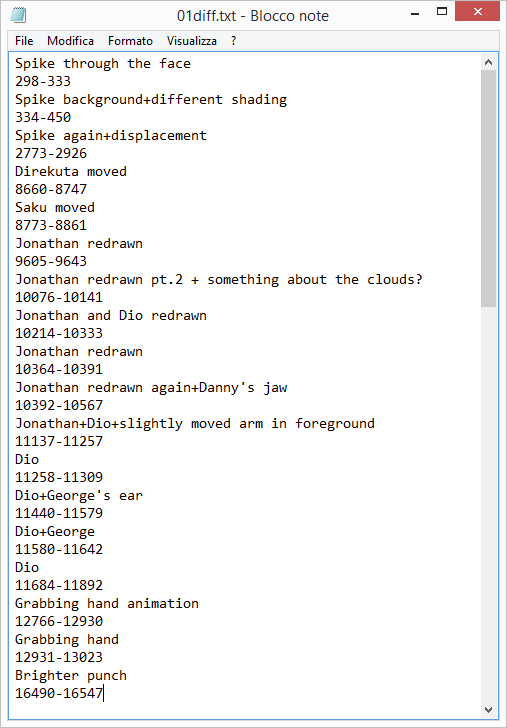
When you’ve finished going through all 34k frames and taking notes of all different frames (it usually takes me from 1 to 2 hours, depending on how difference-heavy the episode is), I suggest you move those to a new folder (or two! I always prefer to keep TV and BD frames separated), and then it’s time to…
5) Do whatever you want to do!
We’ve finally come to the last part of this guide! At the end of this long and (sometimes) boring process, we’ve come out with one (or two) folders with our precious different frames, and a .txt document that illustrates more or less precisely what the differences in said frames are.
Now it’s time to decide what you want to do with them!
Maybe you’ll want to post them somewhere, like I do, or maybe you just want to keep them for reference; either way, what I do once I’ve got all the interesting frames in one safe location can be slightly different:
- If the difference is pretty much the same across a number of frames, I just choose one which best exemplifies said difference;
- If, instead, there is a different animation, or the difference can be best understood by looking at the whole sequence, I make a .webm (for the uninitiated, .webm is a highly-compressed video format, which allows for relatively high quality videos in a very small size).
If, like me, you need to make a video out of a particular bunch of frames, then you’ll find ffmpeg is a valuable asset. To produce a high quality (but small size) .webm I use the following two commands:
ffmpeg -framerate 24 -start_number [first frame] -i [frame folder] -vframes [frame length] -vcodec libx264 ""[save path]\[webm name].mp4"
and
ffmpeg -i [mp4 path] -codec:v libvpx -quality good -cpu-used 0 -b:v 500k -qmin 10 -qmax 42 ""[save path]\[webm name].webm"
As you can see, you need to use two separate commands because (as far as I know) ffmpeg does not directly create .webms from a bunch of frames; we have to create a .mp4 file first and then convert that. You can skip the second step if you’re ok with a .mp4 file, of course!
When you’ve got all the frames and/or .webms you need, you can either post them somewhere or just… I don’t know? Stare at them?
If you do want to post them in a similar format as I do, you can use this script, which is the one I use for the image comparisons on my blog.
Conclusions
Anyway! This last step concludes this weird tutorial/how-to/behind-the-scenes hybrid. I hope this was informative and/or interesting! And if you read this far, then well done! I also hope I did an ok job detailing exactly what I do; I’m not the greatest at explaining things.
If you’ve still got some questions (or if you’ve thought of some improvements!) about this whole process, please let me know!
I’ll see you next time (with a proper comparison), and as always…